
Receiving Blankets: The BEST Homemade Baby Shower Gift
I used to dread getting a baby shower invitation. It seems impossible to have a baby shower without gathering everyone in a circle while the mom being celebrated “Ooohs” and “Aaahs” and “Isn’t it a-DOR-ables?!?!” over each and every present. And I always worried that the present I brought wouldn’t be enough, or wouldn’t get used, or would be the exact same as someone else’s present.
I present to you the solution to all of this baby shower present anxiety:
The heavy-duty receiving blanket.
This blanket is easy to make, cute and personalizable, and, best of all, will actually get used! I had never heard of these blankets before my cousin adopted her son. My aunt made her a whole bunch of these blankets, and she used them EVERY. SINGLE. DAY. The first time I was in charge of a gift for a baby shower, I made four of these blankets. I wasn’t sure if she’d have the same reaction, but her sister confirmed that she uses them ALL THE TIME. Now it’s my go-to gift!
So why are they so great and how do people use them? I’m so glad you asked! The idea behind a receiving blanket is that Mom or Dad will be able to swaddle their newborn in it and keep their baby cozy and calm. I’ve read and heard that many of the receiving blankets available for sale and handed out in most hospitals are either super thin, too small, or both! This pattern solves both of those problems, not to mention it can be used for tons of other purposes!
This blanket is made of two layers of flannel, so it will keep Baby warm while still being lightweight and easy to pack and carry. It’s heavy enough that a breeze won’t dislodge it (hello, autumn walks in the breeze!), and it’s big enough that the expecting family can continue to use it well into their child’s first year and beyond.
So this is all great, but other than just swaddling, what can you do with this blanket? Well, it’s perfect as an extra layer on top of car seats and/or strollers when the weather is nippy, and it works as a good sun shield on bright days. It can be an impromptu changing pad if there isn’t another available. It can even be a burp cloth or nursing cover. As the child grows, it can easily be repurposed into a cape or another game element - assuming that the parents aren’t already reusing it for a little sibling!
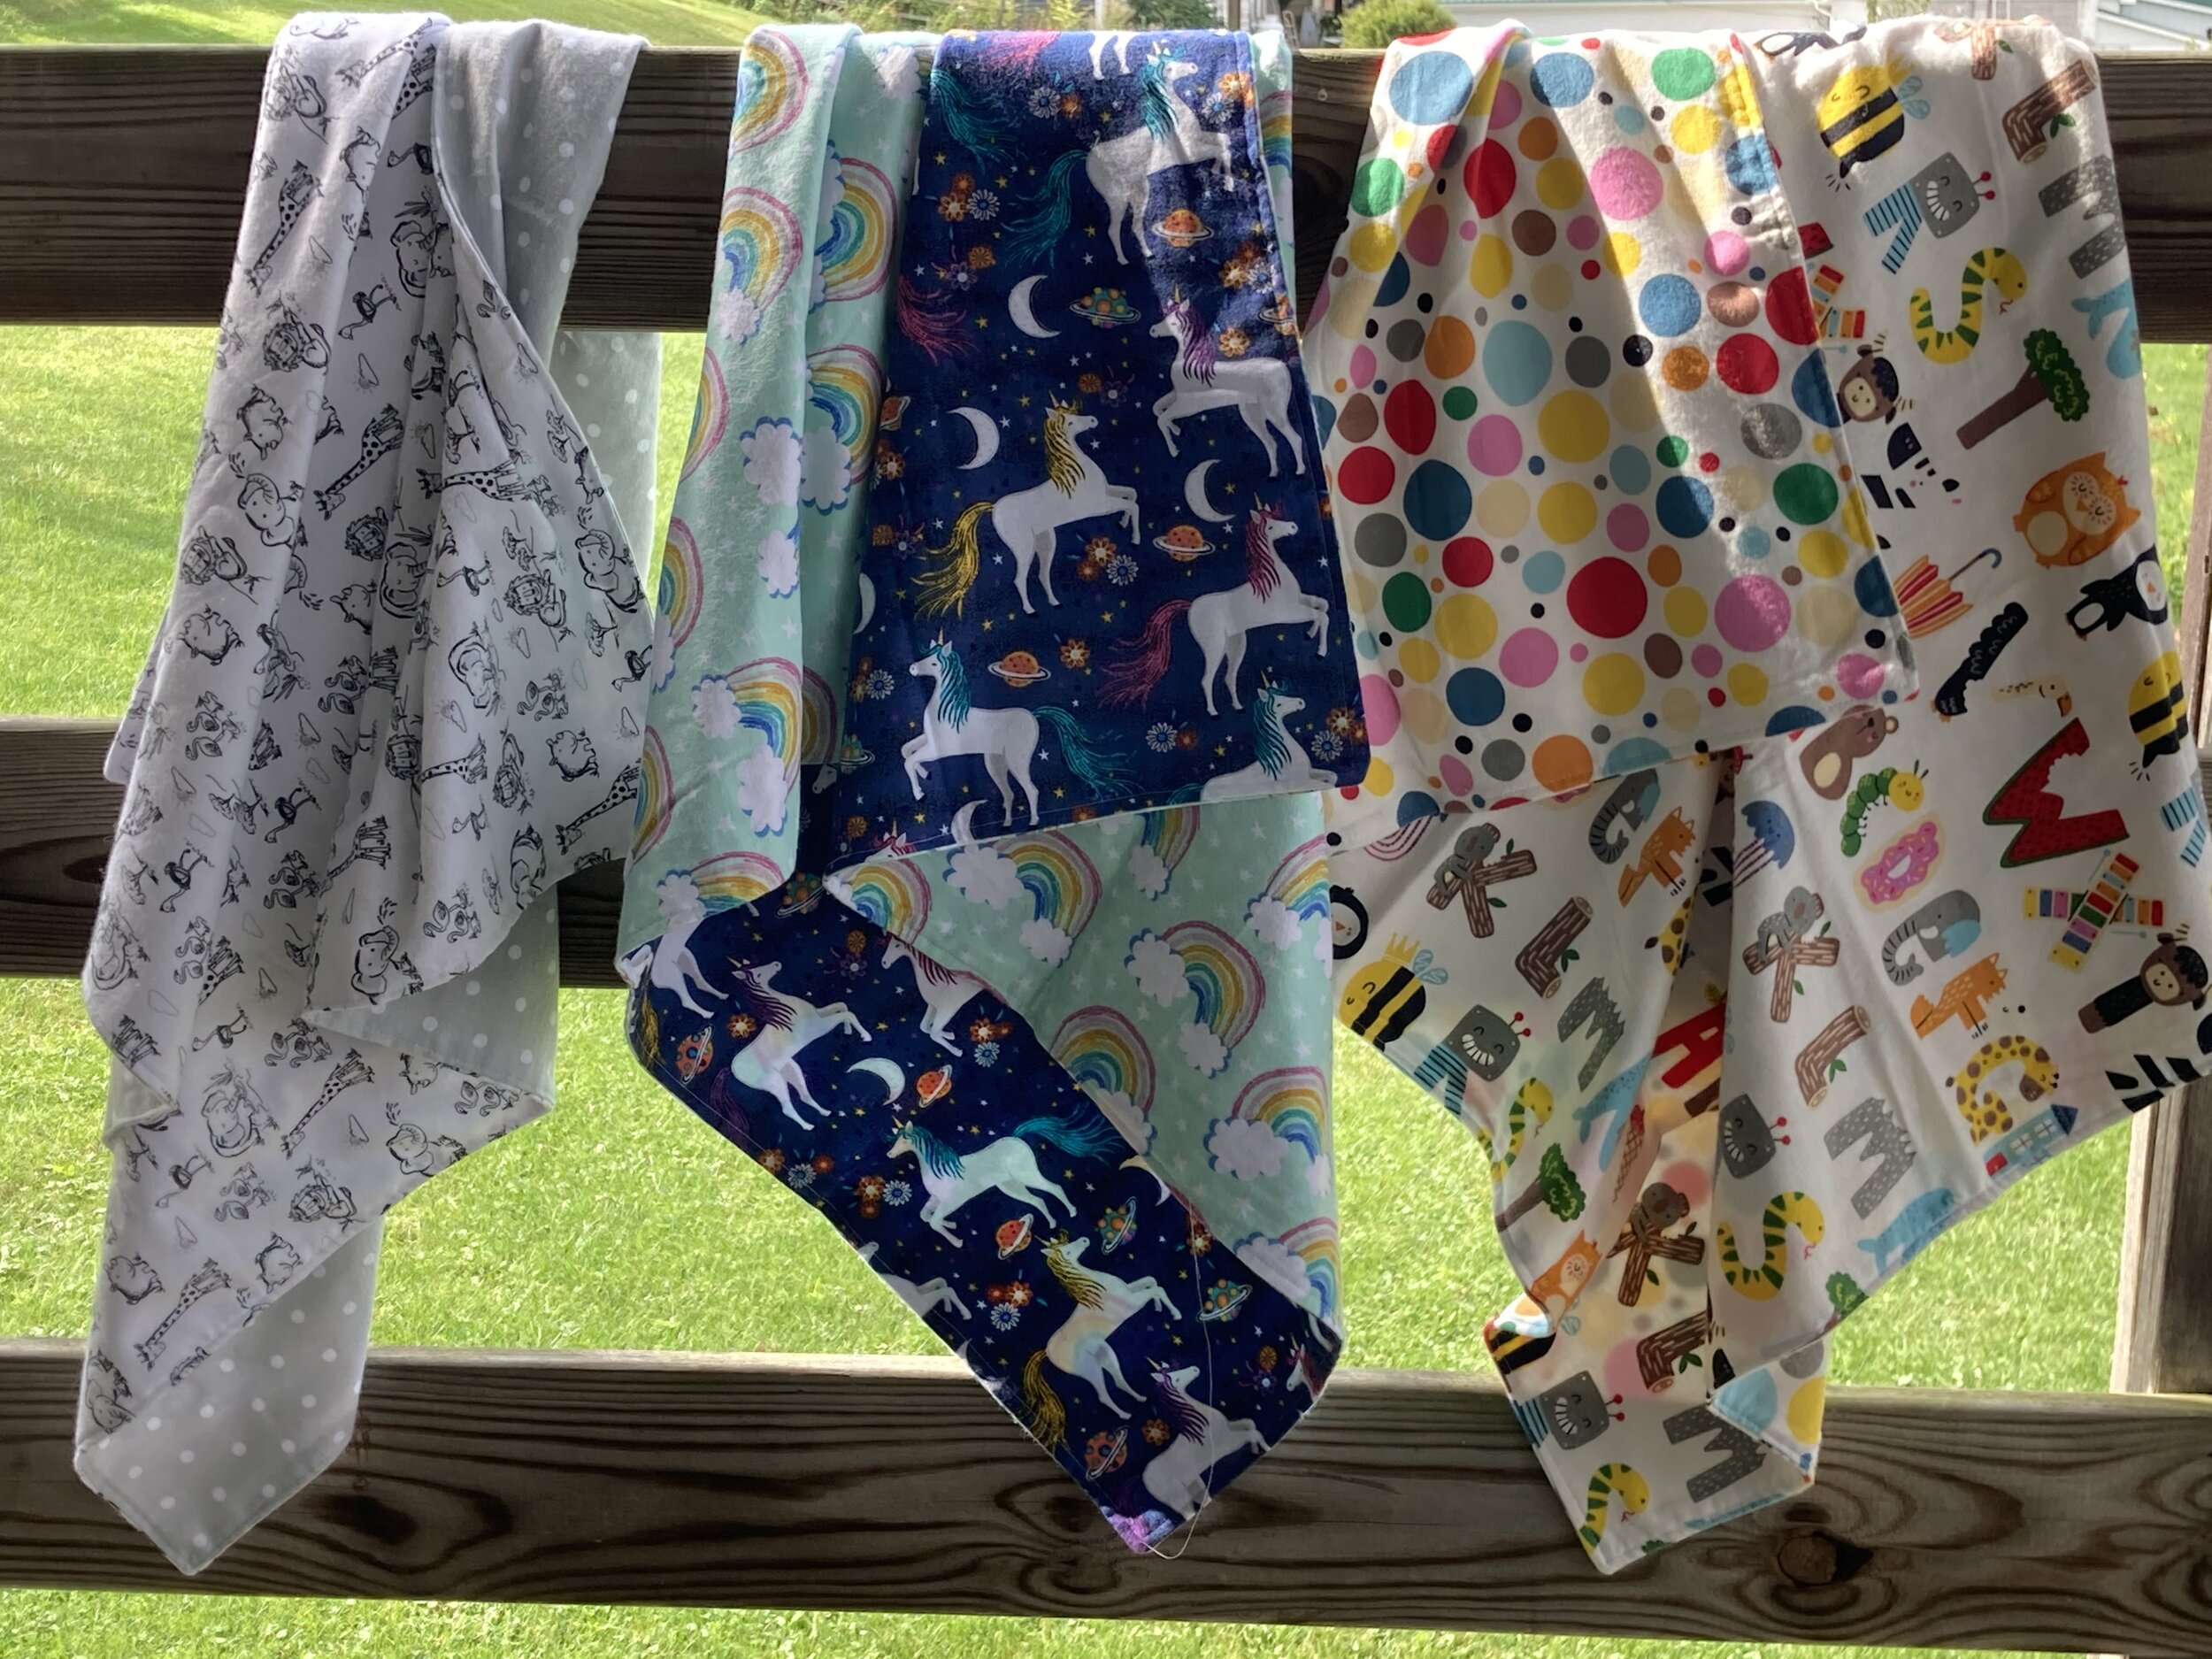
As the person making and giving this gift, you can personalize it to match the expecting parents. You know best whether they’d like bright, bold colors, subdued and gentle neutrals, or to have symbols of a their hobbies. This allows you to personalize the gift and take into consideration the parents’ preferences. You can even personalize them to the season or holidays that happen at the time of year when their baby is expected. Best of all, you can easily make one of these blankets in less than an hour.
How to Make a Baby Receiving Blanket
1). Pick a fabric! Find or buy two 1-yard portions of flannel. You can make this two copies of the same material, or you can use two separate materials as I do in this tutorial. It’s totally up to you, but remember that if you have two different sides, the parents can coordinate the patterns and colors with their child’s outfit or seasonal holidays.

I chose these adorable safari and polka dot patterns for our friends. They’re decorating their nursery with greys and all sorts of animals. Can’t wait for her to see this one!
2). Cut the fabric. Use this rotary cutter to trim each fabric to a 36” by 36” square. Don’t worry about being TOO perfect in your measurements; these edges will only end up in the margian of the inside of our blanket.
3). Pin for sewing. Stack the two pieces of flannel on top of each other so that the right sides are facing each other on the inside of the stack. Pin around the edge of the flannel every 5-10" inches. If you’re a newbie sewer and worried about the fabric shifting, feel free to pin closer together.

4). Start sewing around the edge. Choose a spot partway along one of the sides. Line up the sewing machine’s foot so that you’re sewing 1/4” - 1/2” in from the edge of the fabric. I typically err on a larger seam allowance so that I can make up for any measurement mismatches between the two layers of fabric. Begin sewing around the edge of the material.
5). Keep sewing until you’re ALMOST all the way around. Continue sewing on all four sides of the blanket until you are 3-5 inches from your starting point. Then, backstitch a few times and tie a knot in your thread. Now it’s time to turn the blanket right-side-out so that you can hide your sewing and reveal the beautiful patterns of the fabric.

The gap between my fingers is how much of a hole I left in order to turn my blanket inside-in.
6). Trim the edges of each corner. This reduces bulk and allows your blanket to have squarer corners once you’ve turned it inside out.

The pins are where my stitching lines are, and you can see how much I trimmed. Definitely don’t cut through your stitching, but it’s okay to get pretty close!
7). Reach your hand into the gap you left and find one of the corners from the opposite side of the blanket. Carefully pull this corner through the gap you made to start turning the blanket right side out. Keep pulling and twisting until you have (almost) a finished blanket.


8). We still have a gap in our blanket now, so it’s time to prepare to finish sewing! Find the corners of the blanket and reshape them until they’re completely square. Then, run your fingers along the edges of the blanket. You want to make sure that the seam you sewed in the fabric is right at the edge of each side of the blanket.

Reshape the corners using your fingers until they’re nice and square.

Iron all the way around the edge until you reach the gap where you turned the blanket right-side-out.
9). When you reach the gap you left, fold parts of the flannel over so that they have similar amounts folded as on either side of the gap. Once you’ve done this, iron the fold and each edge of the blanket.


10). Starting a little bit before your gap, sew all around the blanket as close to the edge as possible. This fastens the two pieces of flannel together and hides the hole you left.

Sew around the edge using as small of a seam allowance as you comfortably can.
11). Once you’ve made it all the way around your blanket, trim your strings and tie a knot. Iron the blanket one more time, and you’ve finished making a wonderful, functional gift!
If you’re interested in purchasing flannel to work on this project, here are some of my favorite brands and sources!
Fabric.com <— This website is AMAZING and has every type of material you’d need for this project or any others!
JoAnn Craft Store <— Most of these fabrics can be picked up in store or shipped to you, and they offer so many coupons!
Here are links to the supplies I used for this project: